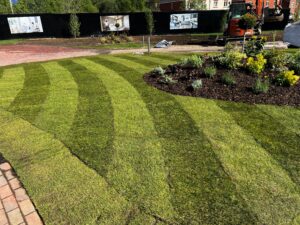
Grass is one of our toughest plants and can survive all kinds of extreme conditions but laying turf is not a case of chuck it down, green side up, give it a welcoming water and enjoy your instant lawn. No, introducing turf to your garden requires as much care as you would give to any new plant – and that means preparation and after-care.
Types of turf
To make your choice easier we offer three principal varieties of turf and a fourth option for shady areas. Each choice offers excellent performance.
Jubilee –
Developed for the finest landscaping projects, golf tees and tennis courts, this luxury lawn turf is a superb choice for any garden. Attractive and easy to maintain, Jubilee turf contains a carefully blended mix of fine-leafed perennial ryegrass, slender creeping red fescue and smooth-stalked meadow grass.
Species Rich
A lawn created with Meadowmat® Species Rich Lawn Turf will be hardwearing, incredibly easy to care for and a real asset to biodiversity. We’ve blended 12 species of slow-growing grasses with 23 types of colourful pollinator-friendly native perennial plants. The result is a multi-coloured carpet of plants just right for relaxing or playing on.
Meadowmat® Species Rich wildflower turf only needs mowing every other week. But it won’t grow too much more than ankle height. So, it’s specially designed for a relaxed maintenance regime so you can happily leave it while you take a holiday. Or, if you work in an organisation where landscape maintenance budgets are tight – think how much money you could save by mowing less often!
Shadesman +
Hardwearing, slow-growing and shade-tolerant, Shadesman+ turf is the ideal groundcover for gardens where trees, fences or buildings cast shadows for part of the day.
Shadesman+ is the result of decades of careful seed selection and plant breeding. Starting with the wild grasses that spend most of their year under the snow of alpine meadows, Shadesman+ has been refined, improved and domesticated. It has become a well-behaved and beautiful turf lawn grass. The Turfonline team has further developed it to create an easy-to-use turf that looks good and thrives in sun or partial shade.
Garden Lawn
For sports areas, general purpose landscaping and low-budget projects, our Garden Lawn turf offer great value for money. Additional resilience comes from the blend of Dwarf Perennial Ryegrass, Slender Creeping Red Fescue and Strong Creeping Red Fescue.
 |
 |
 |
 |
|
|
Measurement:
Many experts will come and measure your lawn for you, but it is simple to do yourself. In order to measure a square/rectangular lawn, you will need to measure the width and the length. You should then have two numbers. Then multiply the two numbers together.
When it comes to measuring a circular lawn, we’re into mathematics. If you have an irregular shaped lawn, it may be difficult to know where to begin. We would suggest splitting the area into smaller squares or squares and triangles. That said, in some cases, you may need to make a generous guess.
When measuring we would strongly advise adding an extra 5% of turf to ensure complete coverage.
Preparation:
You’ve already made the right decision to buy your turf from people who understand turf. And that means the turf that gets delivered will have been expertly nurtured before being carefully cut and transported. Your job is to continue that level of care – and that means getting it down as soon as it arrives. And that means preparation.
Please don’t leave new turf lying around while you get ready, so before it arrives (or even before you order it) get ready. Make sure the site is fully prepared and that you have the right tools, including planks to walk on; and make sure you have the means to water it frequently once laid.
Soil preparation is key to creating a beautiful lawn. If you lay turf onto a quagmire, onto compacted soil or onto waterlogged soil, the plants will take a long time before they start to thrive.
Beneath every great lawn is well prepared soil
The skill in creating a perfect lawn lies in the dirt. It’s the soil beneath the plants that will determine how they establish and thrive in the long term. Hard, impenetrable soil is not a good environment for roots. Neither is lumpy, bumpy stony soil with huge air pockets. Nutrient levels need to be correct for the type of lawn you are creating too. A wildflower lawn needs low nutrients, a grass lawn that will be kept short needs nutrient rich soil.
So, it’s important to spend plenty of time preparing the soil. In fact, you’ll probably spend much more time on soil preparation than you will on sowing seed or laying turf.
What you are aiming for is a nice friable tilth. At least 15cm deep, well drained but able to hold water and with the texture of a nice apple crumble.
Testing your soil preparation
When you think you have your soil prepared properly, there are 3 tests that you should carry out to check.
Is it deep enough?
A good way to test the depth of the soil is to take a nice long screwdriver – one with a blade about 6 inches (15cm) long. Simply push the screwdriver into the soil as far as it will go. The soil should be firm enough to offer a bit of resistance but loose enough that you can push the screwdriver down with hardly any effort. Does it go down to the handle? If so, you’ve done a good job.
 |
 |
 |
|
|
|
Is it friable?
By friable I mean easy to work. What the plants need is a growing medium with plenty of small air pockets between particles. The air pockets allow water to percolate through the soil and they also supply the roots with vital oxygen. First look at the texture. I’ve already mentioned apple crumble – that’s what you need. Big stones, rubble and other debris should have been removed already. If not, start again and do it before the turf arrives.
Now squeeze the soil in your fist – go on – as hard as you can. If water runs out – it’s too wet to do anything with. Leave it to dry for a few days and then try again. A nice friable soil will squish into a lump when it’s compressed, but poke that lump with your finger and it will fall apart. If you squish a fistful of soil, and the resulting lump stays in one piece when prodded – your soil will be easily compressed. It probably contains a lot of clay. You can overcome this by mixing some really good quality topsoil in with your garden soil before seeding or turfing.
Is it level?
Now I appreciate that some folks like gentle hills in their lawn and some folks have sloping gardens. So, a perfectly horizontal surface might not be do-able. Having said that, lumps and bumps in a lawn tend to be scalped by the mower and are more prone to weed infestations, disease and moss. So, they’re not at all desirable. Holes aren’t easy to mow over either.
So, what you can do, once you’ve finished your final raking, is to take a long plank of wood – it needs to be reasonably heavy or it won’t work – fix a rope to either end of it, and then drag it across the lawn area. It will scuff up the surface of the soil a little bit and you will be able to see where the humps and hollows are. Use your rake to adjust the levels and then do the plank test again. It only takes a few minutes and you’ll never regret doing it.
Soil’s ready – now tell me why I need laying boards.
Apologies for taking so long to get to this bit. Now that you’ve spent so long getting your soil preparation perfect – why would you want to spoil it by stomping all over it with your big boots?
Think about how we all walk. The heel of our foot touches the ground first, followed by the toe and then as the front foot bends, we pick up the back foot to move it forwards. For just a few seconds, all of your weight is concentrated in the few square centimetres that are the ball of your foot and your toes.
As we walk we exert a pressure of roughly 50 PSI through the balls of our feet. What would that do to newly prepared soil? Squash it – that’s what. So would wheeling a barrowload of turf across it – think how little of the tyre’s surface is on the soil and how much 5 or 6 rolls of turf plus a barrow would weigh.
The soil would be compressed. Not only will that leave little hollows in a lovely level surface, but it will also ruin the texture. Air pockets would be pushed out and it will be harder for water to percolate through. All that hard work will have been undone in less than a second.
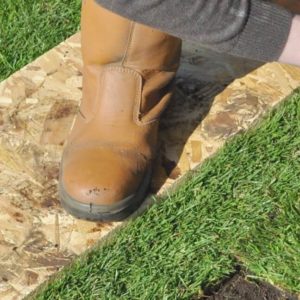
Walking on laying boards effectively makes your feet bigger – like wearing snowshoes. If I were to walk across a board laid on top of prepared soil, the pressure would be more like 0.5 PSI.
Prepare the soil before ordering.
That way there’ll be no last-minute hitches to delay turf laying. Turf must be laid as soon as it arrives, especially in hot weather. Measure twice to be sure of measurements.
There’s nothing more frustrating than finding yourself one or two rolls short for your project. Allow an extra 5-10% for trimming. Just as a precaution – if you need to order more, it will mean two lots of delivery charges. The more complicated and curvier your lawn, the more likely you are to have a little bit of wastage as you trim your turf to fit. If you’ve ever made anything from wood, fabric or pastry you’ll know exactly what I mean about trimmings.
 |
 |
 |
|
|
|
Order the best quality turf you can afford. Just like carpets and baked beans, the better quality products are easier to work with and the results are more rewarding.
Have your tools etc ready for when turf arrives –
You will need:
- A rake,
- laying boards,
- a hat,
- sunscreen,
- a drink for yourself,
- a sharp knife or edging iron and
- a watering can or a hosepipe and, if at all possible, somebody to help!
Always use pre-turfing fertiliser
Yes, it adds a little extra to the bill but it will make all the difference to the establishment and the long-term success of your lawn. Don’t go taking risks with the nutrient levels in your soil. Freshly laid turf needs a lot of energy to help it recover from the stress of harvesting and transport. It also needs the nutritional building blocks to grow strong roots and leaves.
Preturfing fertiliser is easy to apply and quite honestly, if you’re investing in turf, the cost of this stuff is almost negligible. It’s well worth paying the extra to get your lawn off to the right start.
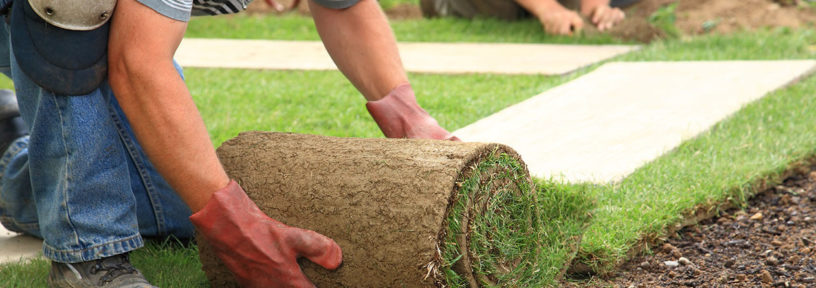
Use laying boards to avoid compacting the turf.
After all the work you’ve done to level and prepare the ground, the last thing you want are big dips in your lawn that match the size and shape of your boots. Laying boards will spread the weight evenly as you work. Start at the back of the lawn and work towards the front so you don’t need to walk on finished work. You know it makes sense! Avoid having small pieces at the edge – they’ll dry out quickly.
If you have a curvy edge, lay one strip of turf along it and bending and curving it to shape. Then lay turf at 90 degrees to this strip and trim each turf to size. Small bits and pieces take an absolute age to establish, are inclined to dry out and die and can sometimes get lifted by the mower when you start your lawncare regime.
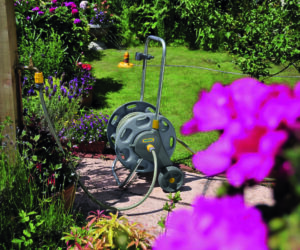
Don’t skimp on the watering
If your turf dries out the pieces may shrink leaving ugly gaps between pieces. If the grass plants are starved of water in those all-important first few weeks your lawn will take a very long time to reach its full potential.
For a really strong, sustainable lawn, the grass needs to get its roots deep into the soil. It needs to be able to draw water and nutrients throughout its whole life. Which hopefully will be a long time. The deeper you can cultivate the soil, the better your new lawn will be able to cope with drought, disease and heavy footfall.
The minimum depth of soil for turfing is 15cm. I like to aim for 30cm or more if at all possible.
 |
 |
|
|
|
Improve the soil.
A lawn is only ever as good as the soil beneath it. Unlike veg beds or flower borders, there is very little you can do to improve the soil under a lawn. So, start off right.
Unless you are a horticulturist with a huge budget it’s difficult to know what exactly you need to add to your soil to make it grass friendly. The simplest option is to source some really good quality topsoil and mix it with your own garden soil.
Dig or rotovate your own soil first
spread imported soil on top of it and then dig or rotovate again to mix the two together.
Laying a new lawn is not difficult
– but preparation is everything! The aim is to remove stones, weeds and roots from the site and to improve the condition of the soil.
Digging using a fork or a rotovator,
-dig the soil well, removing all large stones, roots and other debris. If possible, leave the soil to settle for a few days – you can also remove any weeds that appear during this time.
Levelling and improving the soil by raking it
-(shallow dips and rises are fine but steep ones will make the lawn difficult to mow). Remove any additional stones that come to the surface; and if you are adding topsoil, do this after raking.
Treading!
-It’s now time to walk slowly up and down the area, letting your heels press down on the soil. This firms the surface but without compacting it. If you can get a friend to help it will save a lot of time! However, if it’s very wet you’ll just create mud, so wait for it to dry off a little first.
Final raking.
Go over the area once more with a rake, working from different directions to create a smooth flat surface. If you’re adding a pre-turf fertiliser, do this now and then rake it gently into a depth of a few millimetres.
It doesn’t matter whether you are laying turf, sowing seed or watering a new lawn. For the sake of the long-term health of those plants – please please please use laying boards. It’s a small investment compared to the benefits it will bring.
When to lay turf – time of year
Turf can be laid at any time of year. September and October are the favourite months with landscapers because the turf has plenty of time to establish before being subjected to heavy wear and tear. However, provided the ground is not frozen and the turf can be kept well-watered until it established. Midsummer poses problems because the new lawn can only be looked at and not walked on. Plus, it may need almost constant irrigation to keep it alive.
Should you lay turf during hot weather?
Whenever it gets hot, people start asking me the same question– is it safe to lay new turf or should I wait for cooler conditions? And good turf doesn’t come cheap so it’s an understandable concern; the last thing you want is to watch as it slowly shrinks, dries and begins to life at the edges. But the honest answer is that it is perfectly ok to lay in hot, dry weather – as long as you take some sensible precautions.
As long as the soil is not frozen, waterlogged or extremely dry, turf can be laid at any time of the year! However, the biggest factor that affects the growth of new turf is not the time of the year, it is actually how well the area is prepared for a new lawn.
In terms of the optimum season to lay turf with regards to weather, we would strongly recommend Spring or Autumn. The reason for this is the soil is at the perfect soft texture that makes digging easy. On top of this, there is usually the correct balance of sun and rain in these seasons.
Tips for laying turf in spring
If you’re looking to lay turf in Spring, we would recommend checking the soil. If it has not rained recently, you should water the soil before starting. As the weather in April/May can be temperamental, you will need to ensure that the turf does not try out during the initial growth. It is important to avoid mowing the new turf during the first month of growth in order for the roots to settle into the soil. May is a month full of promise. It’s about birdsong, sunshine and getting the garden ready for summer.
For the past two decades and more, May has always been the busiest month for our customer service, harvesting, despatch and transport teams. It seems as though gardeners throughout the UK traditionally get laying turf in spring or more particularly in May.
-
It’s a comfortable temperature to work in
Once the sun is out and you can see some colour in the gardens around you the gardening bug starts to bite. The temptation to get outside and prepare the garden for al-fresco eating is just too much to bear. Would you want to refurbish your garden if it were freezing cold outside? What if it were really hot? No of course not. May provides a happy medium.
-
Long days help you to avoid sod heating
Sod heating is a very real problem for anyone working with turf. As the air temperature rises so does the risk of your turf losing viability due to this devastating phenomenon. It’s vital in warm weather to get all your turf laid on the same day as delivery. Which is easier to do if it stays light until well into the evening.
-
The soil is more friable
Being able to prepare your soil properly is important when you are laying turf. In May, it’s not uncommon for the soil to be damp but not soggy, well drained but not dry. And that’s exactly what you want when laying turf.
-
The plants establish quicker in warm soil
Look around you. How fast have lawns, trees, shrubs and plants grown in the last week or two? Laying turf in May makes perfect sense because it’s the month where plants actually want to grow. You can see the leaves and stems growing above ground and you just know that the roots are growing equally fast. That’s because the soil is warm and moist. The perfect conditions for plant growth. Establishing turf is all about encouraging roots to grow.
Should you ever avoid laying turf in spring?
Don’t lay turf if you will be going on holiday in the next 4-6 weeks. If you do need to be off-site, please make sure you have made arrangements for the turf to be watered whilst you are away. If the weather is going top be very hot. It doesn’t always happen in the UK but when the weather is hot turf laying is hard work and the risk of sod heating is quite high. If you must be laying turf and the weather is very warm, order your turf in small batches and get it laid and watered within 4-8 hours of delivery.
Tips for laying turf in summer
Although summer months do not present the most ideal of the year to lay turf, it is still possible. It is important that the soil is well watered before the new lawn has been put down to make sure there is lots of moisture to help the grass grow smoothly. During summer, laying turf needs more care. It is imperative that, while the turf settles into the soil, you should avoid walking on and using the grass. If you have children, pets or hopes of a garden party, we recommend restricting access to the new lawn until autumn.
Tips for laying turf in autumn
Autumn is known as the best time of the year to lay turf, specifically between September and October. Take advantage of the perfect balance of heat and rain in these months. Depending on the weather in November, you can still lay turf in this month, as long as the frost has not settled in yet. Laying your turf in autumn is beneficial as the lawn will have had a solid six months to settle in and grow healthily before the next summer!
Tips for laying turf in winter.
Winter is the same as Summer. It is possible to lay turf during these seasons, however, due to the extreme weather conditions leaning to one side, the growth can be held back. This is especially true if not properly and consistently maintained. November in the UK is generally quite mild. We may experience a few early morning frosts. Days tend to be damp and woolly hats are deployed but the soil is still quite warm. Warm soil, very little shade from trees, frequent rain – ideal conditions for plants to establish roots before the really hard frosts come along in January and February. First of all, dig deep. It’s not enough to scuff up the surface a bit and hope for the best. Turf needs at least 15cm of friable soil to root into.
The weather forecast is your friend. Keep an eye on the 14-day forecast and plan your turfing work accordingly. Keep an eye on the weather forecast and pick a time when the weather is going to be settled, mild and dry for a week or so. Dig (or rotovate) the whole area and then leave it to settle for a day or two (if you can). The soil is likely to be wetter than it would be in summer and you need it to dry a bit so that you won’t compact it too much when you are raking.
Rake the soil gently to get rid of any big lumps – but don’t go too mad. Aim for a consistency something like the top of an apple crumble.
 |
 |
When you’re happy that the soil surface is level
- Apply some autumn/winter lawn feed to help the roots develop.
- Rake it in, then you’re ready to start laying turf.
- Use a wheelbarrow to transport rolls of turf from the pallet to the lawn area. At this time of year, rolls may be wetter and heavier which means that they’re harder to carry.
- Make little stacks of turf along the edge of the lawn.
- Avoid laying turf on frozen soil. Make yourself a cup of tea and wait an hour for the frost to disappear.
- Water your turf as soon as you’ve finished laying it.
- Check daily to make sure the soil hasn’t dried out.
- You may not need to water it every day but stay vigilant. If it dries out, you won’t get the lawn of your dreams.
- Don’t walk on your new turf without laying boards for at least 4 weeks.
- Never walk on frozen grass
Ideally, wait to lay your new turf until the winter frost has passed in March/April, giving the lawn more than enough time to establish ready for summer.
How to lay turf / laying turf tips
- Laying turf is pretty much the same at any time of year. You need to avoid walking on it once down (hence the planks) and it’s best to work inwards from the edges, laying alternate strips like bricks so that all the seams don’t line up. This will reduce the amount of moisture loss, especially useful in warm weather.
- Laying turf is easy as long as you follow a simple logical process, starting at the edge and working inwards.
- Start from an outside edge – and lay the first strip widthways slightly overlapping the boundary (you can trim this back when you have finished). Press carefully to make good soil contact but without squashing the turf.
- Continue lying adjacent pieces until you have completed the first row of turf along an entire edge.
- Now start the next row. If you need to stand on laid turf, use a plank to avoid denting or squashing it. It is important to stagger successive rows so that the short edges do not line up (they should alternate like the vertical joints in brickwork).
- Continue like this, butting and pushing the edges for a tight join but being careful not to stretch the turf.
- Finally, you need to trim any untidy edges with an old wood saw or sharp serrated knife – but remember to use the planks to avoid walking directly on the turf.
-
Prepare Yourself
- Have a good breakfast before you start work. Of all turf laying tips, this is the most important in my mind. Trust me, you’re going to burn off a lot more calories than you ever thought you would. Make sure your body is well-fuelled before you start.
- Wear gloves and sunscreen. Turfing is hard on the skin. You’ll be handling wet, gritty soil all day long and your hands will get sore. Wear gloves – I do and so do my colleagues. Ditto for sunscreen – especially if you get warm when working and start removing layers of clothes. Sunburn can be nasty.
Keep hydrated
When you’re concentrating on the job it’s easy to forget about your own health and welfare. Fill some bottles with water before you start turfing and pop them somewhere handy so you’ll remember to drink them.
Don’t rush – but don’t hang about either.
Pace yourself – If I were to ask the rest of my team for turf laying tips, they’d say it’s important to get into a rhythm. Once you have your stacks in place you can work methodically and you’ll be amazed at how much ground you cover.
Use laying boards – Laying boards are a no-brainer for me. When I’ve spent hours and hours raking and levelling the soil ready for turfing the last thing I need to do is unlevel it with wheelbarrow tracks and size 12 footprints. Laying boards used on top of the turf you’ve already put down will help the roots make contact with the soil underneath. They’re excellent.
Don’t skimp on watering
Hopefully, you’ve kept yourself hydrated. Now you need to hydrate the turf too – if you want it to survive that is. Under normal circumstances, a grass plant will have up to a metre of roots to support it. During the turf harvesting process, probably 80-90% of those roots are sliced off. It’s your job to make sure the short roots have enough water to support the plant. Irrigate every day, making sure that the water percolates through to the soil. If you’re not sure, gently lift one corner of turf to make sure the soil is good and damp. Really soak newly laid turf. I mean REALLY soak it. Have puddles sitting on top of it. That water needs to soak right through the turf and into the top 4-5cm of soil beneath it. The first drenching will take the longest. Oh – and pay extra attention to the edges of your new lawn. They’ll dry out quicker than the middle.
-
Keep off the grass!
It’s tempting to run all over your new lawn – but don’t. It will take 3-4 weeks for the grass to be established enough for regular use. If you need to walk on the new grass, use laying boards.
When it gets to the stage that you can tug on a handful of grass and not feel the turf lift, then it’s OK to start using the lawn. You can also give it that all-important first cut …
What to do if you get gaps between your turf
- Butt pieces up really close together
- If necessary, trim to size with a gardener’s knife or an edging tool
- Water well and keep irrigating once or twice a day until the roots are well established.
Tools you will need.
- Gardening gloves – thick ones
- Sturdy boots
- Sharp spade or turf cutting machine.
- Wheelbarrow
- Garden Fork or Rotovator.
- Landscaping rake
- Laying boards
- Knife or edge-trimmer.
- Hosepipe
- Broom
Feed your new lawn
If you have used pre-turfing fertiliser, your new turf will be happy for at least two months. After that, follow a regular feeding regime using the correct seasonal feeds (caution – applying the wrong nutrients can damage your lawn). We have a range of fertilisers and turf feed perfect for certain seasons and lawns.
Watering new turf
This is the most important after-care especially in hot, dry weather. The water must penetrate right into the soil, not just dampen the turf itself. You get far better results from fewer but more thorough watering rather than lots of superficial ones. And water in the late evening if possible; it’s not just to reduce evaporation loss – this is the time of day when the roots will be growing and bedding in.
So, within a few hours of laying, give the entire new turfed area a really good watering. And I mean a lot of water. You can carefully peel back a corner of turf to see whether the soil is saturated – and if it isn’t, keep watering. Then as the days and weeks pass, use your common sense; you don’t want to create a mud bath under the turf, but you don’t want to risk the roots drying out either.
Avoid gaps
Your new turf must be kept moist until it has fully established. If it’s not raining you will need to water it yourself. In hot, dry, or windy conditions you may have to water twice or even three times a day; and water immediately at any sign of the turf drying out or shrinking.
If you do find you haven’t given enough water and gaps appear in between the rows and joins of turf, then fill those gaps with soil/seed mix available from our website.
Eventually, you will see healthy new white roots when you carefully lift a corner of turf, and you know these are established when it becomes difficult to pull back the turf.
Mowing New Turf
In spring and summer, your new turf will be ready for its first mow in 7-10days. But make sure it’s a gentle cut! You just want to level the top of the grass, so raise the cutting height and use a grass box. Then continue to cut (twice a week in spring or once a week in summer), never removing more than one-third of the current height.
If you have laid turf in autumn, follow the spring guidelines. But for winter-laid turf, mow only if it is still growing. Otherwise, leave it until spring. And remember – always make sure your mower blade is sharp!
Ordering your turf
- Don’t order turf until you’re ready to lay it.
The biggest threat to turf quality is time. The longer it sits rolled up between harvesting and laying, the more the quality will deteriorate. Especially in hot weather. I’ve lost count of the number of times I’ve taken longer than anticipated to prepare the ground for turfing – and after all the years I’ve been turfing you’d think I’d have a better handle on it! But Mother Nature has a way of popping extra challenges into the mix. Bad weather, builders’ rubble, bad backs, people stopping and talking…the list goes on.
- Far better to prepare the ground and then order the turf. You can usually get it delivered within 2 working days so it won’t delay things too much.
- Don’t buy more than you can lay in one day – split the delivery if you need to
We’re back to that same subject again – shelf life.
Turf just won’t sit on the pallet for 2 days and still look good. It’s very hard to judge how quickly you personally will be able to lay turf. Remember, I work with people who do this for a living. They’ve got the technique nailed, they have professional equipment and their bodies have most of the right muscles in most of the right places.
100 rolls of turf per day are probably enough for somebody new to turfing. If your lawn is 300 square metres either:
- have turf delivered over the course of 3 days.
- save delivery costs by having all 300 metres delivered at once but have plenty of help on site to get the work done in a day.
- hire a professional landscaper who can work quickly and to a really high standard.
Troubleshooting
Grass is a very robust plant, and if you have prepared the site properly and followed our laying guidelines you shouldn’t have any problems with your new lawn. Nevertheless, you may notice a few natural phenomena in the first few weeks while it establishes into its new environment.
Toadstools
After a few weeks, it’s not uncommon to notice toadstools popping up in the new lawn. This is nothing to worry about! It is particularly common in autumn, or warm and wet conditions, and will soon sort itself out. All soil contains dormant fungal spores. These can lay inactive for years and years – but when the soil is disturbed they can spring back to life and grow into toadstools. You don’t need to remove them – they will disappear after a couple of mows without doing any permanent damage.
There are different types of toadstools and most have been tested and shown to be non-toxic. However, we advise you take normal precautions to ensure that youngsters (and inquisitive adults) don’t eat them, just in case.
Seed heads
Your new lawn might also develop flowering seed heads. Grass produces these naturally although they are more prevalent in the late spring/summer especially it the weather turns hot and dry (drought conditions). When turf is harvested, the majority of the root system is cut off. This is stressful to the grass plants and they produce seed heads as a means of self-preservation. The seed heading will reduce once the new turf has established a new root system, which can take 6-8 weeks. Seed heading will also reduce if the new lawn receives adequate nutrients and is mowed regularly with a sharp blade.
 Always Order Enough Turf For Your Garden
  Common turfing problems and how to avoid them
  Buying Turf For Shaded Areas