How to make a flat green roof – Global warming is affecting us all. Our seas are rising. Storm-water runoff is increasing and yet developers continue to build on floodplains. It is no coincidence that we are seeing more flooding around the UK!
The problem is set to get worse. But there are solutions. One of the simplest methods is to create a green roof. They do not require expensive water harvesting systems or a space big enough to put a storage tank in your garden! A green roof is ideal for reducing your own impacts and it can reduce storm-water run-off by up to 80%!
In this article, we will cover building a green roof so you can make a difference to the environment as soon as you finish reading!
What factors should I consider?
1) Can Your Roof Take The Extra Weight Of The Green Roof?
This question is very important – your roof needs to be able to withstand the weight of 120kg per square metre.
2) Is The Waterproofing On Your Roof In A Good Condition?
Before you decide if a green roof is right for you, consider the water on your roof and whether it drains off properly. This is crucial as repairing leaks once the sedum matting is installed is extremely expensive!
3) Is The Surface Of Your Roof Flat and Smooth?
Green roofing is only really going to be successful if your roof is already as level and smooth as possible. Air pockets can lead to dead patches and whilst the matting will settle onto small hills and bumps, it will not cope with sudden changes like corrugated tin roofs!

Are there any final checks for a green roof?
We all know by now that safety comes first! So, you must be able to access the roof safely (scaffold towers and hop-ups are perfect!) Even though these are the safest options, it’s also about your actions so be sure to take extra care when working at height, even relatively low heights.
The final important check before starting your green roof is to be sure your waterproofing is sound! Easily checked by getting your hose pipe out and soaking the roof. Whilst doing this, keep checking for leaks or damp patches inside. A great tip is to add food colouring to the water which can help to find leaks. This is your last chance to check before you begin the green roof and it’s too late!
Get started with some supplies
 |
 |
 |
 |
|
|
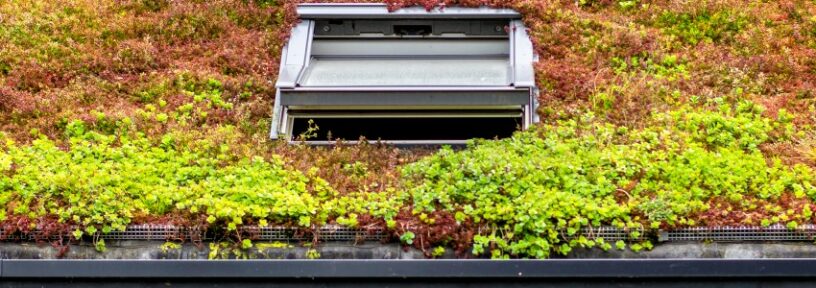
How to create a green roof
Now that you know your roof is suitable for greening, let’s get started with the good bit!
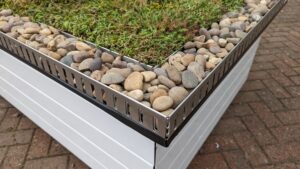
- First edging the roof . You will need some form of edging to protect the sedum from `wind uplift’. But please remember that the edging must still let excess water drain away! Edging can be found on this website .
- Once you’ve checked that your roof is thoroughly waterproof, you can begin to build up the layers you need for the green roof. The first layer you will need is a good quality, strong root barrier, something like a polybutyl pond liner is perfect!
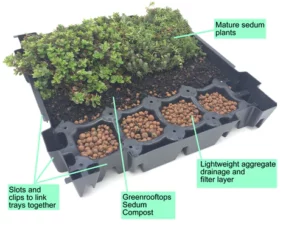
- The next layer you’ll need to complete your green roof is a drainage layer; these can come in a variety of different designs. Some drainage layers have an egg cup design with small water reservoirs throughout but these are un-flexible. Some come in the form of a filter mat which you’ll find is more flexible!
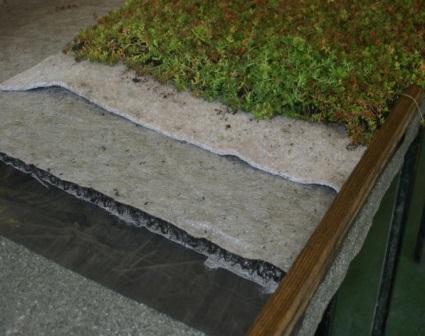
……water retention, sedum blanket…..
- There is then just one more step before you can get your hands dirty! This is the water retention mat, an economical, lightweight fleece holds 9 litres of saturated water per square metre. This is vital to keep your green roof looking fresh and as good as new.
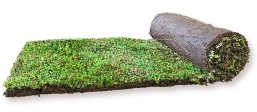
- Next, it’s time to add the sedum blankets to your green roof, ensuring that you can lift the sedum onto the roof safely! You may need to ask for help to lift the sedum mat onto the roof.
- Once the sedum blanket is on the green roof, simply roll it out, making sure you have got the blanket as close to the edging as possible. Once rolled out, remember to unravel the extra piece of matting and lay it flat on the roof. This helps to secure the sedum to the roof!
- Then, you simply repeat the previous step, remembering to start the next roll as compact as possible against the previous roll and on top of the extra piece of matting.
- You then need to trim your sedum matting so it looks apt for your green roof. A great tip is to carefully mark the roll where it needs to be cut to ensure level trimming. Make sure to cut the blankets from the non-vegetated side.
- It’s then about neatening up your green roof. You can do this by making sure all edges are pushed down along the edging strip and all joints have no gaps.
- Finally, remember, just because this greenery is on a roof, doesn’t mean it shouldn’t be looked after like any other grass on the ground. So, once you have installed your green roof, make sure to water it (especially if you have installed it during hot weather!)
By following all these step-by-step instructions, you will have a fantastic looking green roof! But once your green roof is installed, don’t forget about it. You must keep it maintained or all your hard work would have been for nothing!
Where can I find the right sedum matting for my green roof?
If you’re thinking about creating your own green roof, but you’re not sure what sedum matting would be good for you, then you can explore Turf Online’s range of Enviromat here. This is low-maintenance and self-sufficient sedum matting. If you need more advice on matting or green roofing in general, don’t hesitate to get in contact with us on 01832 777111.
 A guide to green roof construction
 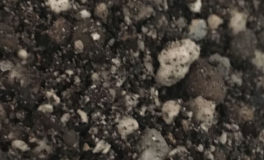 Growing a green roof – Substrate Vs Soil
  Creating a green roof just got easier with Enviromat kits