How we created a green roof in London
Here is Kevin’s photo journal showing how he used Enviromat Sedum matting to create a living green roof for a customer in South West London.
1. Use polythene to protect the waterproofing

This roof was fully waterproofed by the builder and Kev has been assured that the waterproof layer is in good order and that the roof drains well.
If , after heavy rainfall, this flat roof were to have puddles sitting on it for any length of time, the drainage would need to be fixed before the green roof build-up is added.
A note about edgings and upstands
This roof has an upstand – if there were no upstand, then Kev would need to install an edging before putting on the green roof build-up.
Read our blog about green roof edgings
Why use polythene?
This layer of polyethene protects the waterproofing from mechanical damage (Kev’s boots) but it’s main purpose is to prevent plant roots from attacking the waterproof layer.
The polyethene layer is ever so cheap and ever so valuable. Take care not to block drainage outlets with it though.
2. A flat roof needs drainage matting
Drainage mat is a lightweight matting that does exactly what the name suggests.
It takes excess water away from the plants and channels it into the roof’s own drainage system
If the roof pitch is greater than 3 degrees, you do not need drainage matting
Why use drainage mat?
Most of the plant species used on a green roof are best adapted to living in dry conditions. Which means that they hate sitting in soggy soil.
Sedum plants will perish on a poorly drained roof.
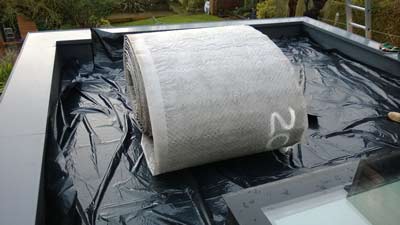
How to use drainage mat
The picture above shows how Drainage Mat will be delivered to you.
It weighs virtually nothing so is ever so easy to lift on to the roof.
Simply unroll it, right to the edges of the roof and trim it to size.
Kev’s Tips for laying drainage mat
- Use a serrated knife to cut the drainage mat. A bread knife is ideal.
- ALWAYS use cutting boards to avoid slicing through the waterproofing
- Unfold the flaps along each side of the matting and lay the adjoining piece on top of the flap
- Covering the joins with gaffer tape will stop the drainage mat blowing away while you’re working
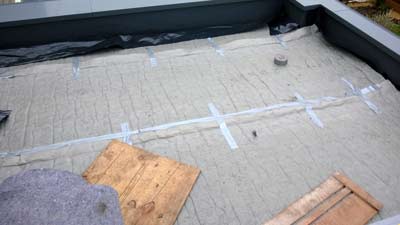
3. Water retention is essential for green roofs
We’ve talked about taking excess water away from a green roof. Now we’ll talk about keeping enough moisture on the roof to support the plants.
This particular fleece holds 9 litres of water per square metre when saturated. It helps to make sure that the plants have enough water – but not too much.
Sedums like good drainage but they do need some water to survive.
This picture shows water retention matting just before Kev to installed it on to this green roof in London
It looks like a rolled up blanket
Kev will simply unroll the water retention fleece and use a Stanley knife to cut it to the same size as the roof.
All of the drainage mat gets covered with water retention mat….right up to the edge of the upstand.
Kev always uses cutting boards so he doesn’t damage the waterproofing with his knife.
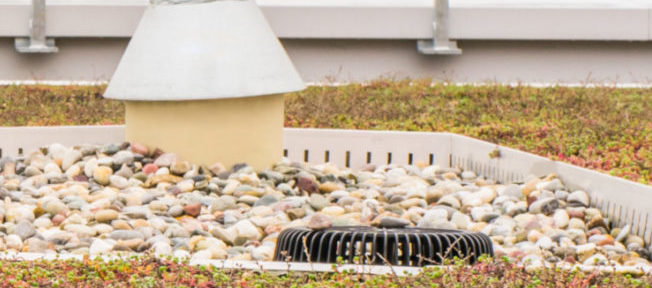
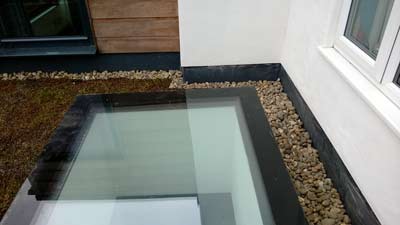
4. The pebble border
As a rule of thumb,
- if a roof has an upstand, it will need a pebble border to help drainage.
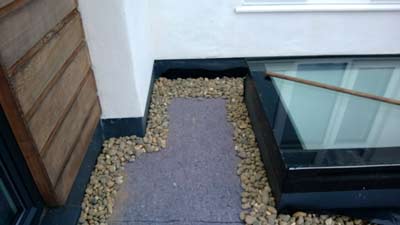
Kev has laid a 200mm border of pebbles all around the edge of the roof. – we normally recommend 300mm but this is a small roof.
Pebbles go on top of the water retention matting and the drainage mat
Never lay pebbles on top of Enviromat – it’ll be a nightmare to weed!
The area between the roof light and the wall is quite narrow and probably shaded.
Kev covers it in pebbles
Narrow strips of Enviromat are best avoided because they dry out easily
Enviromat doesn’t like growing in shade so Kev doesn’t waste his time or the customers’ money by installing it where it won’t survive.
5. How to lay Enviromat
Enviromat puts the green in green roofing.
This is the layer of plants and growing medium that provides the benefits of a green roof. Beauty, insulation and wildlife habitat.
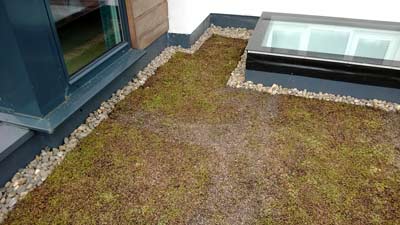
Enviromat is supplied in pieces 1 metre wide by 2 metres long
Kev unrolls each piece and carefully places it on the roof
Each piece is butted up tight either to the pebble edging or to the next piece of Enviromat.
A bread knife is Kev’s favourite tool for cutting Enviromat – he leaves the sedum matting rolled up and slices through the whole roll.
He spreads a thin layer of green roof growing medium over the joins to encourage the plants to grow over them as quickly as possible.
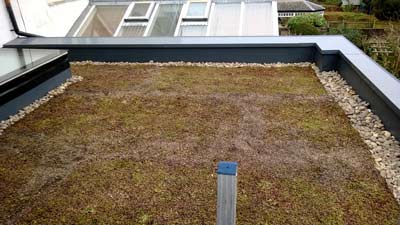
Job done.
Turfonline have published a free guide to installing a sedum roof yourself
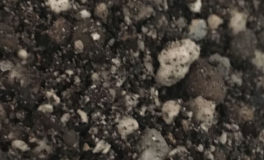 Growing a green roof – Substrate Vs Soil
 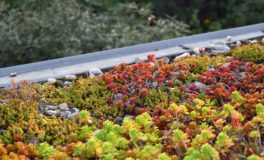 Green roofs for environmentally friendly urban development
 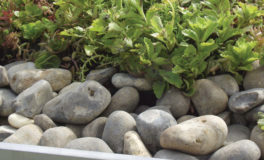 Creating a green roof just got easier with Enviromat kits